Time to Read:
Learn the correct pothole repair procedure: Cutting, tacking, and compaction. A practical South African guide for contractors and DIY projects.
In South Africa, potholes are more than just a nuisance; they are a daily hazard for motorists and a constant challenge for construction and civil contractors. Whether caused by the notorious freeze-thaw cycle in the Highveld or water infiltration in the coastal regions, a pothole left untreated will inevitably lead to severe crocodile cracking and structural failure.
For contractors, municipalities, property managers and serious DIY enthusiasts managing private roads, fixing a pothole is about more than just filling a hole with tar. It requires a professional approach, the right permissions and reliable equipment.
We’ve compiled this comprehensive guide not just for the industry experts, but for anyone curious about what goes into a proper pothole repair.
The Repair Process Overview
Step 1: The Legal “Wayleave”
Before you start up the concrete saw, you must address the legalities. In South Africa, public roads are the jurisdiction of local municipalities or SANRAL.
- Public Roads: You generally cannot repair a public road without permission. Unauthorised work can lead to fines for tampering with municipal infrastructure. You must apply for a Wayleave or Permit from the local roads agency (e.g., JRA in Joburg, City of Cape Town).
- Private Roads: For complexes, farms, private estates, and driveways, you are free to proceed, provided you have the permission of the owner(s) or said lands.
- Reinstatement: If you are a contractor digging up a road for cabling or plumbing, you are legally required to perform a proper reinstatement of the road surface to its original condition.
Wenbro Wisdoms:

•  Document Before You Dig: Always take high-resolution photos of the pothole and the surrounding area before you start. This protects you if a dispute arises later regarding the quality of the road or existing damage.
•  Check for Municipal Service Infrastructure: Even on shallow repairs, be aware of cable or pipe depths. If you are digging out a soft sub-base, look for warning tape indicating buried utilities.
•  Traffic Management: Safety first. Even in a private complex, use cones and caution tape. Ensure everyone is wearing reflective vests and proper PPE. Damage to equipment or injury to your team can cause a list of problems and will almost definitely delay your project.
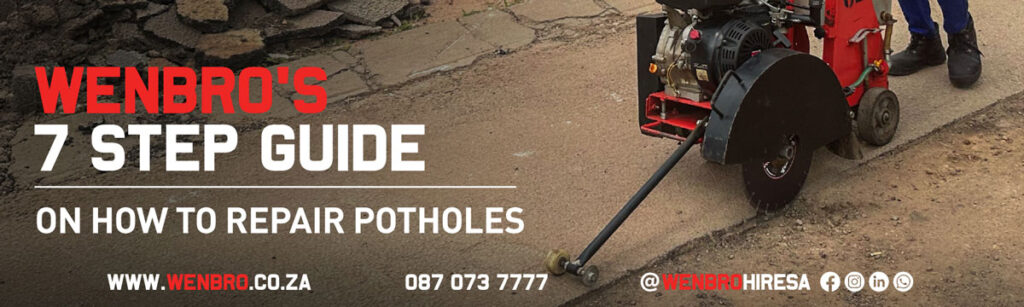
Step 2: Preparation and Cutting
The most common mistake in pothole repair is “throw and go”, this is common in municipalities overrun with potholes when maintenance cannot keep up with how quickly potholes form – this is a regular feature on South African roads. A lasting repair requires a clean, geometric shape. Potholes often have weak edges that will crumble if not properly cut away and removed.
- Mark the Area: Use chalk to mark a square or rectangle around the pothole, extending at least 150mm into the “healthy” road/ pavement to ensure you remove all surface cracks.
- Cut the Edges: Use a reliable Concrete Saw to cut along your marked lines. This creates a vertical face against which the new asphalt can be compacted, preventing the patch from shifting under traffic.
Wenbro Wisdoms:

•  Blade Selection: Ensure you are using a Segmented Diamond Blade. These are designed to cut through asphalt and concrete efficiently without overheating.
•  Water is Key: Always use the water feed on your Concrete Saw. Wet cutting suppresses hazardous silica dust that is damaging to your lungs and keeps the blade cool, significantly extending its lifespan.
•  Cut Depth: You don't need to cut through to the subsoil; you only need to cut through the asphalt layer (usually 30mm–50mm).
•  The "Over-Cut": When cutting a square, slightly cross your cuts at the corners. This ensures the asphalt breaks out cleanly right at the corner, rather than leaving a rounded, messy edge.
Step 3: Excavation and Clearing
Once the perimeter is cut, the damaged material inside must be removed.
- Break it Out: For hardened road surfaces or sub-base issues, a heavy-duty breaker is essential. A breaker such as the Hikoki 70J Breaker delivers the impact energy needed to break up old asphalt and concrete quickly
- Dig Out Patching: Remove all debris, loose gravel, and standing water. The hole must be bone dry.
- Sub-base Check: If the sub-base (the layer under the road) is soft or wet, it must be dug out and replaced with fresh G5 material; otherwise, the repair will sink.
Wenbro Wisdoms:

•  Choosing the Breaker Point:
   ◦  Moil Point (Bull Point): Use the pencil-shaped point for the centre of the pothole. It concentrates force to fracture hard material effectively.
   ◦  Flat Chisel: Switch to the flat chisel when working near your saw-cut edges. This helps you break the asphalt cleanly against the cut line without shattering the surrounding good pavement.
•  Testing the Base: How do you know if the sub-base is "soft"? Poke it with a screwdriver or a crowbar. If it sinks in easily, or if the soil moves like jelly when you walk on it, you must dig deeper until you hit firm ground, then build it back up with compacted G5 sub-base.
Step 4: Priming (Tacking)
New asphalt will not stick to old dirt or dry edges. You need a bonding agent, typically a bituminous binder or tack coat.
- The Binder: You need a bituminous binder or tack coat.
- Apply the Tack Coat: Using a Bitumen Sprayer, apply a thin, even coat of emulsion to the bottom and, crucially, the vertical sides of the hole. This “glues” the new patch to the old road and waterproofs the joint.
Wenbro Wisdoms:

•  Where to Buy: You can buy "Cold Pour" bitumen emulsion or "Tack Coat" in 20L or 200L drums from specialised road surfacing suppliers or industrial hardware retailers.
•  Avoid "Pooling": Do not let the bitumen form puddles at the bottom of the hole. Puddles will seep up into the new asphalt (bleeding), making the patch soft and sticky. It should be a tacky coating, not a swimming pool.
•  The Paintbrush Hack: If you don't have a sprayer for a tiny repair, use an old paintbrush or a broom to “paint” the vertical edges thick with bitumen. The edges are the most critical part to seal against water.
Step 5: Filling the Pothole
Choosing your material is critical:
- Hot-mix Asphalt (HMA): Best for permanent repairs and larger areas. It is durable but must be applied while hot.
- Cold-mix Asphalt: Ideal for smaller patches or DIY fixes. It is workable at ambient temperatures and cures over time.
- Aggregate: Ensure your mix has the correct aggregate size for the hole depth.
- Layering: If the hole is over 50mm deep, fill it in layers (lifts) rather than all at once to ensure proper compaction throughout.
Wenbro Wisdoms:

•  The "Mound" Rule: Never fill the hole flush with the road. Asphalt compresses significantly. Fill the hole so the loose asphalt sits about 20-25% higher than the surrounding road. When you compact it, it will sink and become level.
•  Keep it Hot: If using Hot-mix, keep it covered with a heavy canvas tarp in your bakkie or truck. If it cools down below 85°C, it becomes hard to shovel and impossible to compact properly.
•  Shovel Technique: Don't throw the asphalt from a distance. This separates the stones from the binder (segregation). Place it gently with the shovel.
Step 6: Compaction
Compaction is the most important stage of a pothole repair. If the asphalt isn’t compacted correctly, air voids remain, allowing water ingress and early failure.
Primary Compaction:
Use a Pedestrian Roller to compact the asphalt layers. The roller applies consistent, even pressure across the patch, ensuring proper compaction density and a long-lasting repair. This is especially important on roadways that will carry vehicle traffic. We recommend the Wenbro RM60 or RM90 Pedestrian Roller, available in both petrol and diesel.)
- Make multiple slow passes over the patch.
- Start at the edges and work toward the centre to lock the new asphalt against the existing pavement.
- Ensure the final surface is level with the surrounding road after compaction.
Final Finish & Tight Areas:
In confined spaces or where a roller cannot reach cleanly, finish with a Plate Compactor. Wenbro has a range of Plate Compactors, all suited to exactly this.
Power Tip: If you’re running electric tools or working after hours, keep a Wenbro Open Set Generator handy, such as the Wenbro 6kVA Generator.
Wenbro Wisdoms:

•  Rolling Beats Impact: Asphalt responds best to static and vibratory rolling, not vertical impact (meaning a machine like a Compaction Rammer is not suited for this job).
•  Edge Control Matters: Always compact edges first—poor edge compaction is the leading cause of pothole re-failure.
•  Temperature Counts: Compact while the asphalt is still workable; once it cools, density cannot be recovered.
Step 7: Sealing
Finally, prevent water infiltration—the number one enemy of roads—by crack sealing the edges.
- Seal Coating: Use liquid bitumen or specialised tape where the new patch meets the old road.
Wenbro Wisdoms:

•  The Sand Finish: Once you have painted the bitumen seal over the joint, sprinkle a handful of fine sand or dust over the wet bitumen. This prevents the sticky bitumen from adhering to car tyres and being pulled up by vehicles that drive over it once your pothole repair is complete.
•  Clean Up: A neat job is a professional job. Sweep away all loose stones and dust around the patch that are not protecting your bitumen seal coating before you leave. Loose stones on a road are a skid hazard for motorbikes and can crack windscreens.
Repairing a Pothole? Consider Wenbro.
At Wenbro, we don’t just Hire out equipment, but as a manufacturer, we have insight and a deeper understanding of how it works. From our robust Plate Compactors to our industrial-duty Bitumen Sprayers, our “small” construction equipment is built extra solid for tough conditions.
Whether you are a civil contractor needing a fleet of breakers or a property owner fixing a driveway, Wenbro offers:
- Hire: Affordable rates for short-term projects.
- Sales: Purchase quality Wenbro equipment.
- Service & Spares: We service, repair and keep stock of spares for all Wenbro equipment. We back what we sell.
Ready to fix it for the long run? Don’t let potholes damage your reputation or your vehicles. Equip yourself with the best tools for the job.
View our full range of Compaction and Construction Equipment here. Need trusted advice? Contact us, or visit us in-store to discuss your project needs.
